Tuesday, July 23, 2013

Writing Sample plugin for Jenkins


There are so many plugins available for Jenkins which will cater most of your needs. But there are chances where you have to write your own plugin.
Jenkins Plugin should be developed in java and we have to create a .hpi file out of that. But don't be panic about this as this can be done automatically. Process is as follows.

Step 0: Set ~/.m2/settings.xml as specified in https://wiki.jenkins-ci.org/display/JENKINS/Plugin+tutorial

Step 1: On a linux machine
mvn -U org.jenkins-ci.tools:maven-hpi-plugin:create


Step 2: This will give create sample code. Now
cd newly-created-directory
mvn package

Most probably you will get an error saying 

libjna-java mvn test failed with java.lang.UnsatisfiedLinkError: com.sun.na.Native.open(Ljava/lang/String;)J 
at com.sun.jna.Native.open(Native Method)  
at com.sun.jna.NativeLibrary.getInstance(NativeLibrary.java:236)  
at com.sun.jna.Library$Handler.<init>(Library.java:140)  
at com.sun.jna.Native.loadLibrary(Native.java:366)  
at com.sun.jna.Native.loadLibrary(Native.java:351)  
at hudson.util.jna.GNUCLibrary.<clinit>(GNUCLibrary.java:105)

This is because of a known issue.

Workaround would be add the following lines to your project's pom.xml inside the dependencies node and if not existing create dependencies node

<dependency>
               <groupId>net.java.dev.jna</groupId>
               <artifactId>jna</artifactId>
               <version>3.2.2</version> 
</dependency>

Step 4: After doing that use following command
mvn install
Now you can see a hpi file created in target directory.

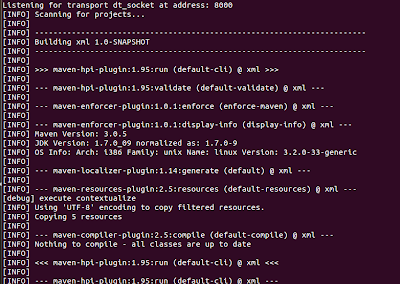
Step 5: Run the newly created plugin using command
export MAVEN_OPTS="-Xdebug -Xrunjdwp:transport=dt_socket,server=y,address=8000,suspend=n"
mvn hpi:run


Step 6: Open your favorite Browser and go to http://127.0.0.1:8080 which will show you following screen

Step 7: Create a new Job and in build steps you can see "Say Hello world" as a Task. Add this with some name.

Step 8: Now build this project and you can see Hello world output as shown below

~ Yananarayana Dande


Monday, July 22, 2013

Jenkins - A Centralized Tool to run your Automated Tests

Most of the times Test team will end up writing different test harnesses to test different components and there should be  a platform from which a user can start a run of specific automation suite on a specified environment with given configurations remotely using a web page. For achieving this and other features listed below I was given a task by my manager to design a Tool. 

I have selected Jenkins and customized it to achieve this. 

Features
  • Single Sign-on for all your Automation Needs
  • Common Console for starting any Automation Run
  • Configure all your Automation Suites from a single place
  • Horizontal coverage by adding all automation suites 
  • Vertical dig down possible for an Automation Engineer to understand root cause for Test failures
  • Email Notification once run in completed
  • Confluence Page is updated with results/custom message once run is completed
  • Code Coverage can be published
How to Achieve this
  1. Install Jenkins 
    1. Follow instructions given at https://wiki.jenkins-ci.org/display/JENKINS/Installing+Jenkins
  2. User Management
    1. Use LDAP Plugin by following instructions given at https://wiki.jenkins-ci.org/display/JENKINS/LDAP+Plugin
  3. To change standard Appearance to suite your organizational rules 
    1. Use Simple Theme Plugin by following instructions given at https://wiki.jenkins-ci.org/display/JENKINS/Simple+Theme+Plugin
    2. Use Dashboard View Plugin by following instructions given at https://wiki.jenkins-ci.org/display/JENKINS/Dashboard+View  
  4. To add and manage nodes
    1. Use Node and Label parameter plugin by following instructions given at  https://wiki.jenkins-ci.org/display/JENKINS/NodeLabel+Parameter+Plugin
    2. Use Multi Slave config plugin by following instructions given at https://wiki.jenkins-ci.org/display/JENKINS/Multi+slave+config+plugin
    3. Use Jenkins Slave Setup Plugin by following instructions given at  https://wiki.jenkins-ci.org/display/JENKINS/Slave+Setup+Plugin
  5. For Code Control
    1. Use Git Plugin by following instructions given at https://wiki.jenkins-ci.org/display/JENKINS/Git+Plugin
  6. Build
    1. Use Jenkins Gradle Plugin by following instructions given at  https://wiki.jenkins-ci.org/display/JENKINS/Gradle+Plugin
  7. Test Results
    1. Copy To Slave Plugin has Bug - JENKINS-14578 so we decided using NFS instead
    2. Use TestNG Results Plugin  by following instructions given at https://wiki.jenkins-ci.org/display/JENKINS/testng-plugin
  8. Publish
    1. Use build-user-vars-plugin by following instructions given at https://wiki.jenkins-ci.org/display/JENKINS/Build+User+Vars+Plugin
    2. Use Jenkins Email Extension Plugin by following instructions given at https://wiki.jenkins-ci.org/display/JENKINS/Email-ext+plugin
    3. Use Confluence Plugin by following instructions given at https://wiki.jenkins-ci.org/display/JENKINS/Confluence+Publisher+Plugin
  9. Code Coverage Tool
    1. Use Jenkins Cobertura Plugin  by following instructions given at https://wiki.jenkins-ci.org/display/JENKINS/Cobertura+Plugin

Adding a New Slave


  1. As a first step add a slave node in Jenkins UI


Start Slave process

  • wget http://[your jenkins host]:[port number]/jnlpJars/slave.jar
  • ${NOHUP} ${JAVA} -jar slave.jar -jnlpUrl http://SERVERNAME:PORT/computer/USER__NODENAME/slave-agent.jnlp &

Then you can see the slave at Slaves Page


Configuring a New Project

  • Fill the Project name, description for the project and Location of code on github
     
  • Add Parameters required for the project to run. So these are called as build Parameters, which means these will change per build.
  • Bind this project to a given node
  • Use Custom workspace to parse your results
  • Give the build steps
  • Specify files to be processed by testng-plugin for giving results and to create trend graph
  • Create an editable e-mail notification as a Post Step so that it sends email notification to selected people in the organisation in the given format
  • Create a Publish Task as Post build step to publish your results in Confluence


Your centralized Tool is ready and you can run your Automated Tests now :) 

Build Now(Run Tests)

From left hand pane in the project page say "Build Now" and it will take you to following screen

Now give the build parameters and say build. This will start running your test cases.

Tests' output in Console

You can have a look at the running tests in the console (Select console from Left Pane) as shown below


Also once tests are completed you can see the TestNg reports and Trends as shown below


Also you can see from which build this test cases is failing when you dig the links in TestNG reports


Dashboard

You can collect different statistics on a dashboard page as shown below


Also an email Notification is sent after the run

Confluence Update

After every run it will update the results in the configured confluence page

Happy Testing :)

~Yagnanarayana Dande